
DuckConvert · · Updated
Compress PNG & JPG Offline: The Private TinyPNG Alternative
Every web developer, designer, and content creator knows the struggle of dealing with massive image files. A 5MB photo might look beautiful, but it will absolutely destroy a website's load time and ruin your SEO score.
For years, the standard solution has been to drag those images into a cloud-based service like TinyPNG or Optimizilla. But what if you are compressing proprietary app screenshots, unreleased product photos, or documents containing sensitive information?
Uploading your images to a random server is a massive security risk.
Why Cloud Compressors Are a Risk
When you use a traditional online image compressor, you are engaging in a risky transaction:
- Upload Time: You have to wait to push megabytes of data over your internet connection.
- Server Processing: A third-party server runs the compression algorithm. You have no guarantee that they delete your original file.
- Download Time: You have to wait to pull the new file back down.
- Paywalls: Because server compute costs money, these tools almost always cap you at 20 images or a 5MB limit before begging for a credit card.
DuckConvert: Client-Side Compression
We have built a free, offline Image Compressor that runs directly inside your web browser.
Using modern Web Worker technology, our tool downloads the compression algorithm to your machine. Your images never leave your device.
The Local Advantage:
- Instant Processing: Without the upload/download cycle, compression starts instantly and runs at the speed of your computer's CPU.
- No Size Limits: Because we don't pay for server bandwidth, we don't care if you compress a 50MB file.
- 100% Private: It is mathematically impossible for us to view or store your images. You can even load the page and disconnect from the internet before compressing!
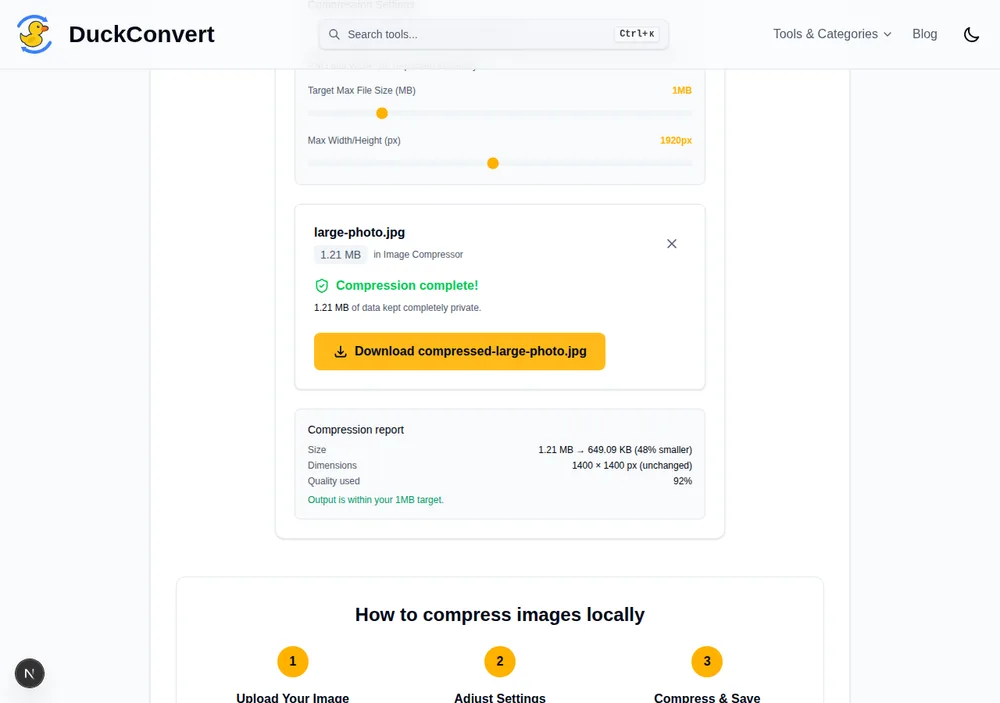
A real run of the compressor above: 1.21 MB in, 649.09 KB out — 48% smaller, same dimensions. No upload step in between.
How to Compress Images Locally
- Go to the DuckConvert Image Compressor.
- Drag and drop your
.png,.jpg, or.webpfile. - Adjust the slider to set your target maximum file size (e.g., 1MB) or max resolution.
- Click Start Compression.
- Instantly see how much space you saved and download the optimized file.
Stop giving your unreleased assets to the cloud. Start compressing your images locally today.
Two different things are called "PNG compression"
The word covers two operations that produce very different results, and knowing which one a tool is doing explains most of the confusion around PNG file sizes.
Lossless optimisation keeps every pixel exactly as it was and simply stores them better. PNG compresses in two stages: first a per-row filter predicts each pixel from its neighbours and stores the difference, then DEFLATE compresses the result. There are five filter types, and the encoder has to choose one per row. Most software picks quickly using a heuristic. An optimiser like oxipng or zopflipng tries far more combinations and spends much longer looking, which is why running one over an already-saved PNG routinely finds another 10 to 30% with no change to a single pixel.
Lossy quantisation is the other operation, and it is what actually produces the dramatic savings. It reduces the image to a palette of at most 256 colours, choosing them to fit the specific image and dithering to disguise the gaps. This is what pngquant does and what services advertising "70% smaller" are almost always doing. It is genuinely lossy, and calling it PNG compression is where the confusion starts.
Which one your image wants
Screenshots, diagrams, logos and interface graphics quantise beautifully. They were rarely using more than a couple of hundred distinct colours to begin with, so restricting the palette costs almost nothing visible while frequently cutting the file by two thirds or more.
Photographs and smooth gradients do not. A sunset uses thousands of subtly different tones, and forcing it into 256 produces visible banding or a dithered speckle across areas that should be smooth. For photographic content, PNG is usually the wrong container in the first place, and converting to JPEG, WebP or AVIF will beat any amount of PNG optimisation.
The mixed case, a screenshot containing a photograph, is where judgement is needed. Try quantisation and look at the photographic region at full size before accepting it.
The savings that cost nothing at all
Several easy wins have nothing to do with either algorithm.
Bit depth is the first. A PNG saved as 24-bit colour when it only ever uses 40 colours is storing three bytes per pixel to express something a palette could hold in one. Most optimisers detect this automatically and it is often the single largest saving available on a screenshot.
Metadata is the second. Editors write colour profiles, EXIF blocks, creation timestamps, software identifiers and sometimes an embedded thumbnail into ancillary chunks. None of it affects display and it can account for a surprising share of a small file. Note that stripping it removes colour profile information too, which matters if you are working in a wide-gamut space.
Interlacing is the third and the one people get backwards. Adam7 interlacing, which makes an image appear progressively as it loads, makes the file substantially larger, often by 20% or more, because it destroys the row-to-row coherence the filters depend on. On a modern connection the progressive effect is imperceptible. Turning interlacing off is usually free size.
Measure at the size you actually ship
The most common mistake is optimising a 3000-pixel image that will be displayed at 600. Resizing to the dimensions the page uses saves more than every technique above combined, and no compression setting recovers what serving an unnecessarily large image costs.
Get the dimensions right, choose lossless or lossy based on the kind of image it is, strip what you do not need, and then compare the result against the original at full size before shipping it.